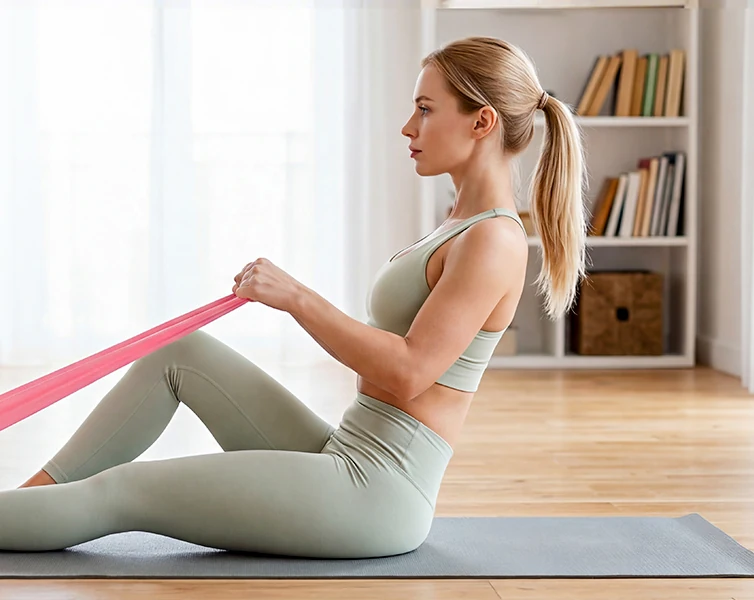
A useful home routine should be easy to set up, clear enough to repeat and flexible enough for an ordinary week. Resistance bands can be part of that routine, alongside simple bodyweight movements. Start with a few exercises you can perform with control, then keep a record of what you actually do.
We built this guide around the practical decisions that often get missed: where to train, how to organize equipment, what to record and how to adjust a session when time is short. The sample sessions are general planning examples for adults, not a personalized program or a rehabilitation plan. Use the instructions supplied with your exact equipment, and seek qualified guidance if a health condition, injury or unfamiliar movement makes the setup uncertain.
Give the routine a place in your week
Choose two realistic appointments before choosing a long exercise list. They might fall on weekday evenings, weekend mornings or whatever part of the week you can protect. Leaving time between similar strength sessions can make the schedule easier to manage. The aim is a repeatable arrangement, not an impressive plan that depends on every day going perfectly.
The CDC's adult activity guidance includes muscle-strengthening activity on at least two days a week, alongside aerobic activity. A strength routine is therefore one part of a broader activity pattern. A short band session does not automatically replace walking, cycling or the other activity you enjoy.
Write the appointments somewhere visible and add a smaller backup version. For example, your main session may allow time to practice several movements, while the backup keeps only the movements you already know well. This is an organizational choice, not a claim that every shortened session produces the same result. It keeps an interrupted week from becoming an excuse to abandon the routine altogether.
Prepare a space that supports the whole movement
Check the room while standing, sitting and moving through the exercise positions you intend to use. The floor should be stable and clear, with enough room for your arms and legs to travel without contacting furniture. Move loose objects out of the area before you begin. A mat can make floor work more comfortable, but it should not slide or hide an uneven surface.
Think about the direction of pull as well as the floor plan. An elastic band can extend beyond your body during a movement. Keep people and pets outside that space, and do not place a face or fragile object in a possible recoil path. If a setup depends on a door, prevent someone from opening it and follow the exact anchor instructions.
Do not turn a convenient household object into an improvised anchor. A chair, handle or shelf can look sturdy without being designed for that load. If the available room cannot support the instructed setup, choose a suitable unanchored exercise instead. Your session should fit the space you have, rather than depend on an arrangement you cannot verify.
Use a short equipment check before every session
Lay out the equipment before starting the timer. Check the bands, textile surfaces, stitching and any handles, straps or connectors you will use. Look for damage, unusual wear or a fastening that no longer closes properly. If a component is damaged or its condition is uncertain, leave it out of the session and follow the manufacturer's replacement guidance.
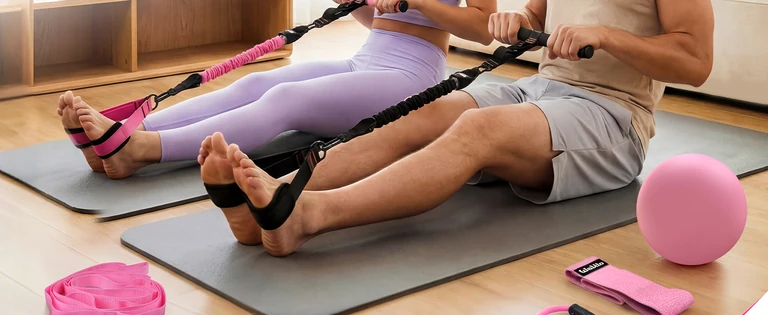
Check the connection as a complete path: the part you hold or wear, the connector, the resistance element and any approved anchor. One sound component does not make a mismatched assembly suitable. Use the supplied or explicitly compatible parts, and do not add knots, makeshift clips or other modifications to solve a setup problem.
The American Council on Exercise's band guidance calls for checking bands and handles before use, moving under control and never letting a stretched band snap back. Make those habits part of your routine from the first session rather than something to consider only when the resistance feels heavy.
Choose equipment for the exercises, not the other way around
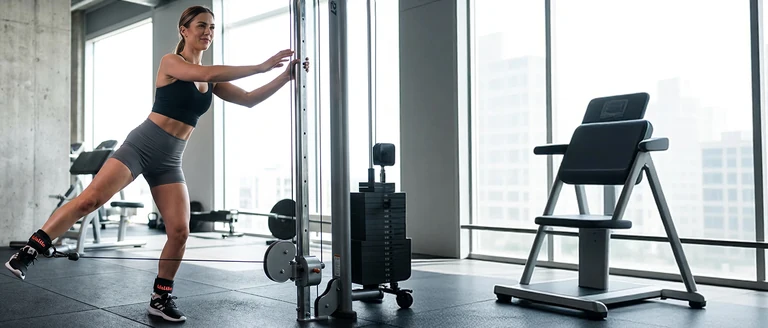
A fabric loop can suit particular hip and leg movements, while a longer flat band offers a different shape and working length. Cable attachments need suitable gym equipment and do not supply resistance by themselves. Knowing these distinctions prevents a common problem: trying to reproduce a workout with an item that has a similar name but a different intended use.
For a home session, begin with movements supported by the equipment you actually have. You can combine a band exercise with a bodyweight squat, a controlled bridge or an appropriate wall push-up. There is no requirement to attach a band to every movement. The choice should serve the exercise, not create a more complicated setup for its own sake.
If you are still choosing equipment, read our resistance band selection guide first. Then compare the exact options in fabric resistance bands and stretch bands. For each product, check dimensions, included components and the instructions before assuming it supports a movement shown elsewhere.
Build a session around a few clear jobs
Organize your session by movement rather than by a long list of body-part labels. Include a lower-body movement, a suitable pulling movement and a pushing movement across your weekly plan. Add other exercises when they have a clear purpose and you have enough time to perform them properly. If your equipment cannot cover a particular job, use an appropriate bodyweight option or seek help selecting another movement.
Do not treat this framework as a complete assessment of your needs. It is a way to organize an ordinary home session and notice obvious gaps. A qualified trainer can help select exercises and adapt them to your experience, movement abilities and available equipment. Learning a small number of movements well is more useful than rushing through unfamiliar variations.
The beginning of a session should allow time to prepare. Start with comfortable movement and practice the planned exercises without added resistance or with an easy option. Notice how you feel that day and whether the room or equipment needs adjustment. The first loaded repetition should not be your first attempt to discover how the setup works.
Sample session A: learn and repeat
This example combines familiar bodyweight work with suitable band exercises. Select versions you can perform comfortably and use only setups permitted by your equipment instructions. The exercise order is a planning example; it is not a requirement to continue when a movement feels wrong or an attachment is unsuitable.
| Movement | Equipment choice | What to practice |
|---|---|---|
| Squat or sit-to-stand | Bodyweight; a suitable stable seat if needed | A controlled lowering and return within a comfortable range |
| Row | A band and setup explicitly supported by its instructions | Stable body position and a controlled return |
| Wall push-up | A suitable stable wall and clear floor | Moving the body together without rushing |
| Glute bridge | Bodyweight on a stable floor surface | Lifting and lowering without forcing the back into an arch |
| Side steps | An appropriate loop at the instructed placement | Small deliberate steps and controlled leg position |
Start with a manageable amount of practice. The NHS strength guidance describes eight to twelve repetitions as a common set structure and advises building up gradually. That is a general reference, not a reason to force a repetition when your technique or comfort changes. Record what you complete so the next session has a useful starting point.
Rest long enough to begin the next set with control. Use the pause to check your setup, breathe normally and review one useful cue. Avoid filling every rest period with another demanding exercise just to keep moving. A routine becomes easier to learn when each movement has a clear beginning, an attentive working period and a deliberate finish.
Sample session B: keep the structure, change the emphasis
A second session can preserve familiar movements while changing the emphasis or the order. You do not need an entirely different workout each time. Repetition gives you a chance to notice whether a setup feels more stable, whether your range remains consistent and whether your equipment choice still suits the movement.
| Movement | Possible role | Planning note |
|---|---|---|
| Comfortable squat variation | Lower-body practice | Repeat the version you learned in session A |
| Suitable band row | Pulling practice | Keep the approved setup and record the same reference position |
| Wall push-up | Pushing practice | Choose a stable position you can reproduce |
| Standing curl | Optional arm work with a suitable long band | Use only the product's instructed grip and foot arrangement |
| Bridge or controlled side steps | Additional lower-body work | Choose one rather than adding every option |
If the first session was already enough to learn, repeat it instead. Variation is a tool, not an obligation. The useful question is whether a change helps you practice a movement or solve a practical problem. A different exercise name on every day of the calendar does not necessarily make a routine more balanced or easier to follow.
Keep the basic lower-body movements controlled
For a bodyweight squat, begin with a comfortable stance and move only through a range you can manage. Lower with control, then return without bouncing. If you are using a seat as a reference, choose a stable one and make the setup deliberate. Adding a band should wait until you understand the intended placement and can maintain the movement without it.
For a floor bridge, start on your back with the knees bent and feet placed securely. Lift the hips in a controlled movement, keeping the task focused on the movement rather than trying to reach the greatest possible height. Lower deliberately. The ACE glute bridge demonstration provides a visual reference; do not turn the end position into a forced back arch.
A short loop can add a different demand to selected lower-body exercises, but it does not automatically improve every variation. If the loop changes the movement in a way you cannot control, remove it and return to the version you understand. Our lower-body kit guide explains how the equipment choices differ.
Let control guide the resistance choice
Watch the beginning and the return of each repetition. It is easy to focus only on the hardest-looking part and overlook a rushed start or a band pulling you back. Choose an option that lets you manage the whole movement. If the first repetition requires a sudden jerk, pause and reconsider the resistance or exercise setup.
Elastic resistance changes as the band stretches, so the final part of a repetition may feel different from the beginning. Do not chase an arbitrary distance from an anchor or a number printed on a band. Stay within the equipment's instructions and choose a setup you can repeat. The same label can feel different in another exercise because the geometry has changed.
Stop the set when you can no longer maintain the intended movement. Pain, dizziness or an unusual symptom is a reason to stop exercising and seek appropriate guidance, rather than a target to train through. Ordinary effort and a loss of control are not the same thing. You should be able to explain why you ended a set without relying on a slogan about pushing harder.
Change one useful variable at a time
Progress is easier to understand when your setup stays consistent. If you change the band, exercise, anchor position and repetition count at once, you cannot tell which change affected the session. Keep the movement and setup familiar, then adjust one variable when it is appropriate. That might mean performing more controlled repetitions within your plan or selecting the next suitable resistance option.
Do not increase resistance simply because a calendar says another week has passed. Review the recent sessions. Were you able to complete the intended movement with a consistent range and controlled return? Did the equipment stay in the correct position? Was the final set still organized? Those observations give you better information than a deadline created before you tried the routine.
A harder session is not the only useful result. You may become more consistent about setup, improve your ability to repeat the same movement or make the routine easier to fit into your week. Record those changes too. They help distinguish a sustainable practice from a series of unrelated workouts that are difficult to compare.
Keep a log you will actually use
A short log is enough. Write the date, exercise, selected band and completed sets or repetitions. Add a setup note when it affects the movement, such as the instructed anchor position or a repeatable foot position. Finish with one observation that will help next time. Avoid turning every session into a complicated data-entry task.
| Exercise | Equipment and setup | Completed work | Next-session note |
|---|---|---|---|
| Squat | Chosen bodyweight version | Record sets and repetitions | Repeat the same comfortable range |
| Band row | Exact band and approved setup | Record sets and repetitions | Keep the return controlled |
| Side steps | Selected loop and instructed placement | Record equal work in each direction | Check that the band remains correctly positioned |
Use ordinary descriptions rather than pretending every band exercise has a precisely measured external load. If you record a manufacturer's nominal resistance label, identify it as a label and keep the setup details beside it. A reproducible exercise record is more useful than a number that suggests a level of precision you have not measured.
Have a shorter version for a crowded day
Decide in advance which familiar movements form your shorter session. Keep the preparation and equipment checks, reduce the amount of planned work, and choose a combination you already know. A shortened session should remove complexity, not compress the same work into frantic repetitions with no time to check the setup.
For example, you might keep one lower-body movement, one suitable pull and one push from your regular plan. If you cannot create the approved band setup that day, use an appropriate alternative you have already learned. Do not invent an anchor to preserve a particular exercise. The equipment is there to support your routine, not to dictate an unsafe compromise.
When a session is missed entirely, resume the plan at the next appropriate opportunity. There is no need to double every exercise to punish a busy day. Look at why it happened: an unrealistic appointment, too much setup or an exercise list that takes longer than expected. Adjust the practical obstacle so the next week is easier to organize.
Solve the small problems that interrupt consistency
The band keeps moving out of position
Pause and check placement, clothing and the selected size or tension. Follow the product instructions, and reduce the movement or choose a different appropriate option if necessary. Do not compensate by twisting the band into a narrow cord or fastening it with an improvised clip. If the movement and band do not work together, change the choice rather than repeatedly fighting the equipment.
You spend more time arranging equipment than training
Group exercises with compatible setups and keep the required components together. Prepare the space before the session, and limit the number of variations. A simple routine can still provide useful practice. Add complexity only when it serves a clear purpose and you can manage the transitions without rushing.
You forget which option you used
Record the product's actual label or another unambiguous description immediately after the exercise. Color alone may be confusing if several sets use similar shades. Keep components with their own kit and avoid mixing pieces from different systems. The small amount of organization pays off when you return to the routine several days later.
Use the first few sessions to settle the routine
During the first session, give yourself permission to do less while you learn where the equipment belongs. Identify the right band, rehearse the instructed setup and find a comfortable position for each movement. Write down any uncertainty instead of repeatedly improvising around it. A short, clear question about a connector or exercise position is easier for a qualified trainer to answer than a general feeling that the workout did not go well.
At the next session, begin with the same familiar arrangement. Look for practical differences: whether the room is ready, whether you remembered the correct component and whether the exercise order flows naturally. Keep the working plan modest while these details become familiar. This is not a race to add resistance; it is a chance to make the routine reliable enough that you can evaluate it.
After several sessions, review the log as a whole. If one exercise repeatedly requires a long setup, consider whether its place in the order should change. If a movement remains confusing, arrange instruction before adding more work. If the session consistently exceeds the time you have, reduce the exercise list or the planned amount of work rather than rushing the final movements.
Be specific when something goes well. You might note that the chosen loop stayed correctly positioned, that the same stance was easy to reproduce or that you completed the planned session without interrupting it to search for a missing part. Those observations describe a routine that is becoming easier to use. They also help you preserve the useful parts when you eventually make changes.
If you train with someone else, keep separate equipment choices and records. Sharing a room does not mean sharing the same resistance, repetition count or pace. Take turns when space is limited, keep the other person's movement area clear and check your own setup each time. Do not adjust another person's band or attachment while it is loaded.
When you travel or change rooms, treat the new space as a new setup. Recheck the floor, clearance and any permitted anchor before starting. Bring the instructions and a short list of familiar alternatives. A routine that depends on one particular room arrangement needs a planned adjustment when that arrangement is unavailable.
Finish the session deliberately
End each exercise by reducing tension under control before changing position or putting the band down. Finish the session with comfortable movement as appropriate, then check the equipment again while it is easy to see. A damaged area or loose component noticed after training should be addressed before the next session, not hidden in the bottom of a bag.
Follow the exact care instructions for the materials in your set. Allow equipment to dry as directed and put it somewhere clean and accessible. Keep the selected components together, with the instructions nearby. A few minutes of organization can make your next session easier to start without adding another task to your training plan.
Review one useful note before you leave the space: what you will repeat, what needs an adjustment or which question you want to ask a qualified trainer. Then put the next session in your calendar. If your main interest is building a lower-body setup, continue with our bands, ankle straps and barbell pads guide.
If you prefer a routine built around a Pilates bar, explore the Pilates collection as a separate equipment choice. Use the selected kit's own exercise and connection instructions. A bar-based system has a different setup from the simple loop and bodyweight examples above; it should not be substituted into them without appropriate guidance.